
AAMA 511-08 performed in Los Angeles
Most of the calls we receive have to do with water intrusion of some type. Be it rain leak testing, leaking from decks, walls or even higher up, it always entails testing of some sort. Many times, however, destructive testing is necessary to source the leak. Although destructive testing is somewhat messy and and costly, it’s necessary for more definitive answers. Especially when we’re talking about the AAMA 511 standard.
To begin, there is a great deal of investigation that goes into the AAMA 511 test prior to ever applying any water. Included in this are conversations with the occupants or others who have experienced the leaking. Past weather is also considered. For example, the test company may want to simulate specific weather (if possible) from taking known data points from past weather events.
Overall, the AAMA 511 test much like the ASTM 2128 is a forensic guide to locating a water source.
Investigations before testing
For this project, we were contacted to source water leaking from an unknown source. Consequently, because of the large scale of this project, the water source possibilities were endless. For this reason, we elected to incorporate the use of our thermal imaging camera to scan the room walls and ceilings. All we knew from the occupant(s), was that water was entering the building from the floor.
Did I mention is was a multi-family building? That alone presents challenges, and to make matters more difficult, it was the middle unit. All this did was add to the complexity of the situation.
After initially walking through the unit which we were investigating, we observed water on the floor, which was obvious. As an investigator, having water on the floor, with no other water penetration indications was perplexing. Luckily, the use of the thermal imaging camera was paramount to our investigation, at least initially. Thermography allowed us to start the process of sourcing the water intrusion into this unit without a Window Water Intrusion Test With Destructive Testing.
Thermography and Infrared Technology is Key
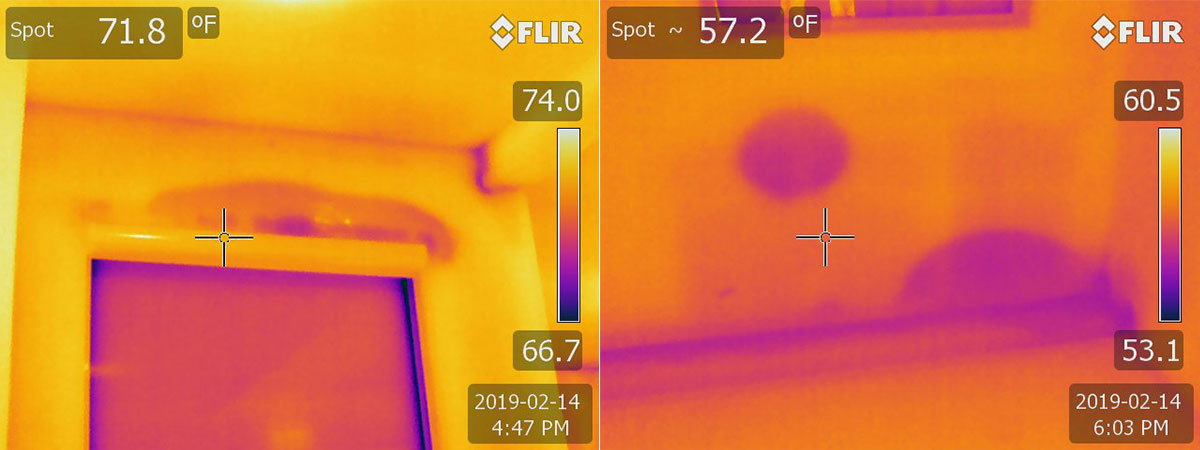
Through utilization of thermographic practices, we were able to see water up high on the wall and under the ceiling. The obvious and first thought was the deck above was leaking, from the upper unit into the unit we were investigating. Coincidentally, this was also the conclusion of the contractor hired to make repairs after testing was finished.
After visiting the upper unit with our handy infrared camera system, we started to see new anomalies come to light. What did we see? We saw moisture patterns observed in the wall, under the windows.
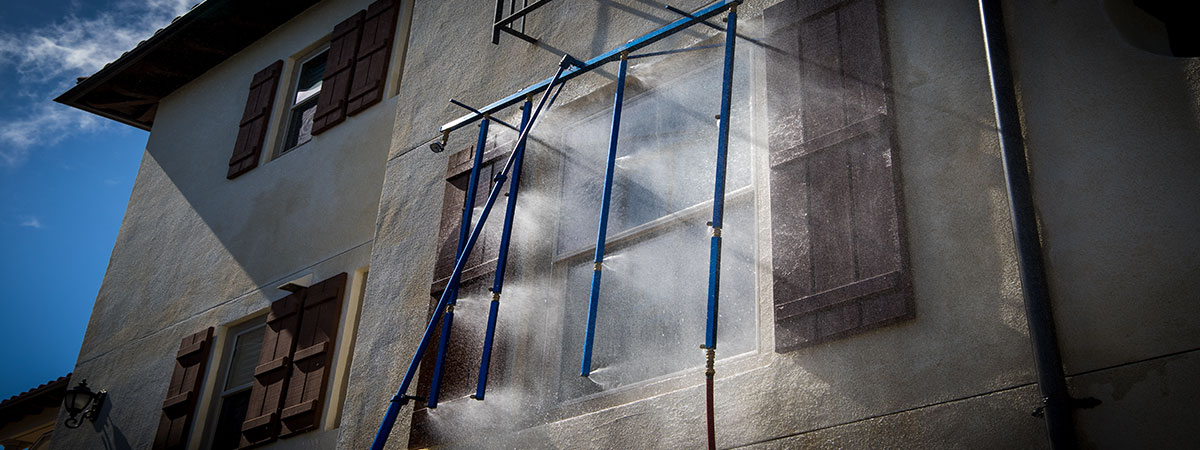
So, in light of this significant finding, we also tested windows and walls higher up. We shared this information with the management company and they elected that now, with new data, that a Window Water Intrusion Test With Destructive Testing was necessary to gain physical verification of water intrusion in the unit.
Testing results
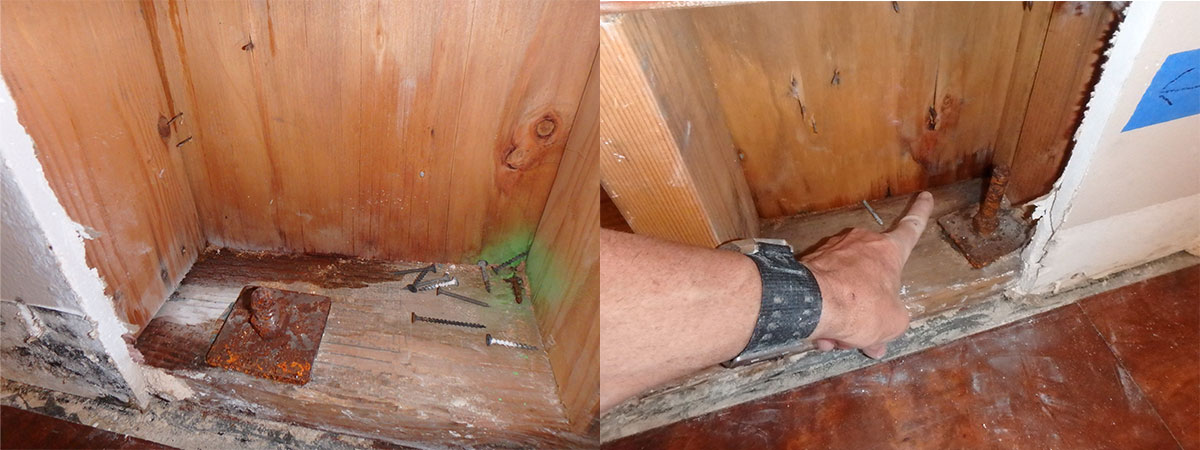
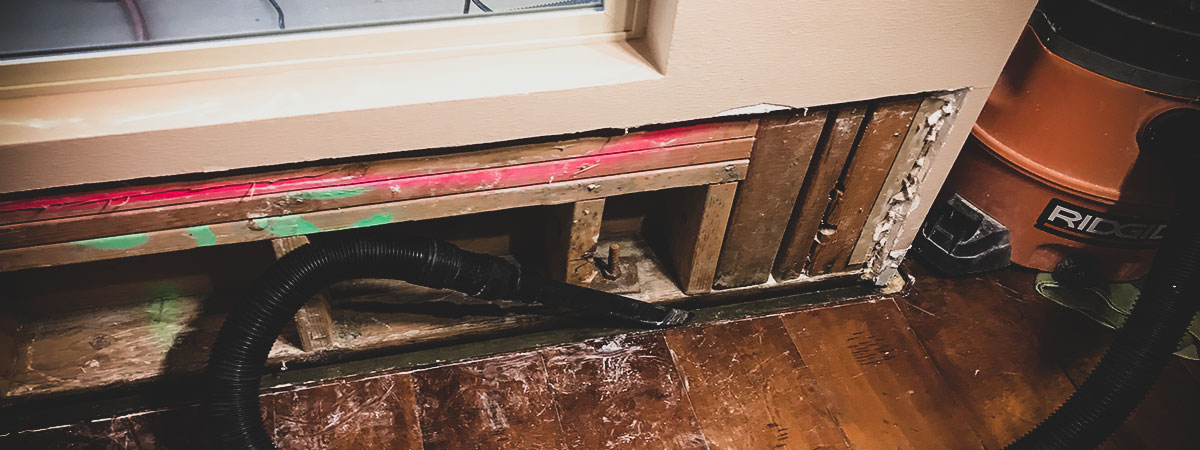
The contractor then removed interior finishes around the windows which were to be tested, in the lower unit. So that was done, after-which we chose the windows to test, using the ASTM E1105 and other general leak detection practices as our guide. We then put the windows and walls through a battery of tests including isolation steps to differentiate what component was leaking, some of which are shared in the images below. If we had not performed Window Water Intrusion Test With Destructive Testing, we may not have sourced this leak so quickly. With that said, now you can see that although the infrared camera systems are super valuable tools, they cannot see through walls and in many instances real physical verification is needed which means opening us interior finishes to get to rough framing.


